This step in warranty claims it the first real piece of the puzzle when it comes to defining the different warranty claim scenarios. I will always encourage you to come to the define warranty claim types screen and create a custom claim type, and copy from the closest standard claim type. SAP does a great job of providing multiple base claim types that will likely be close to your final needs. For this coming example, I’m going to follow the postcrediting warranty claim types, and create a custom version. If you aren’t sure which option to choose, check out my post on the basics of warrany claims to gain some insight.
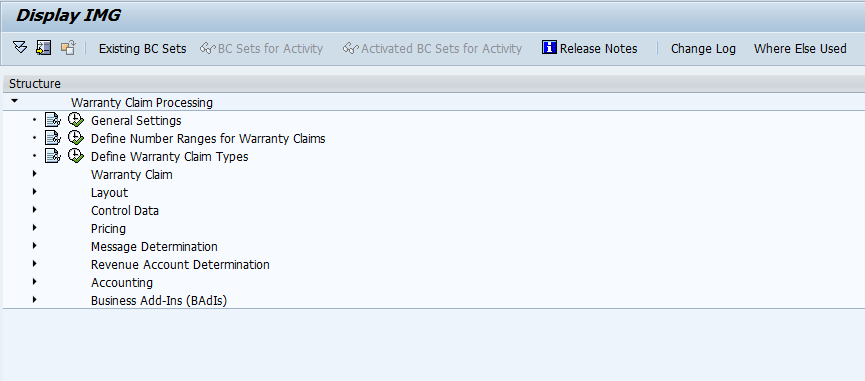
Now, we start at the OWTY transaction to see all the configuration pieces. We select Define Warranty Claim Types.
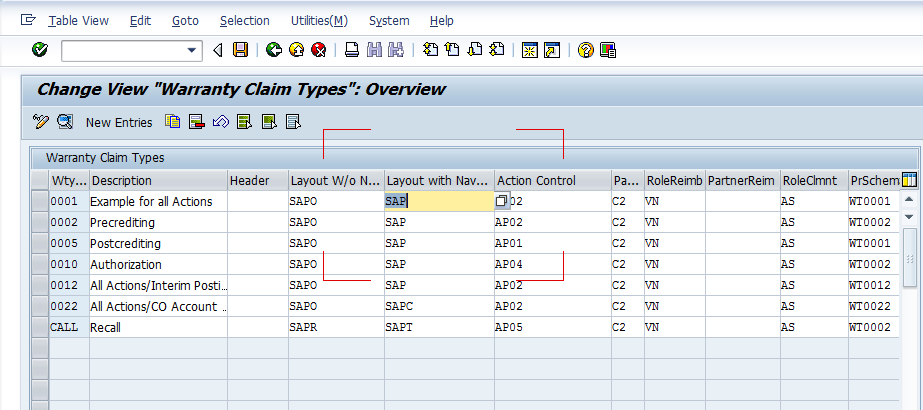
By default, SAP provides multiple options to start with. In fact, you might be able to use the out of the box options, but being the SAP purest, I always encourage you to create a ZXXX claim type.
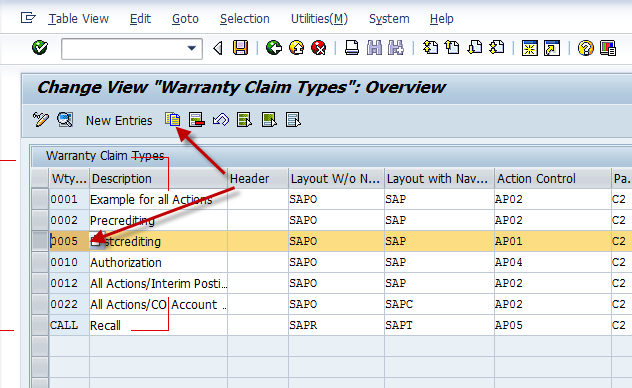
So, highlight the option you want to copy, and press copy. This will bring you to the Define Warranty Claim Types detail screen.
Again, this is a busy screen. there are a lot of fields, and most of them are vital to the workings of the claim.
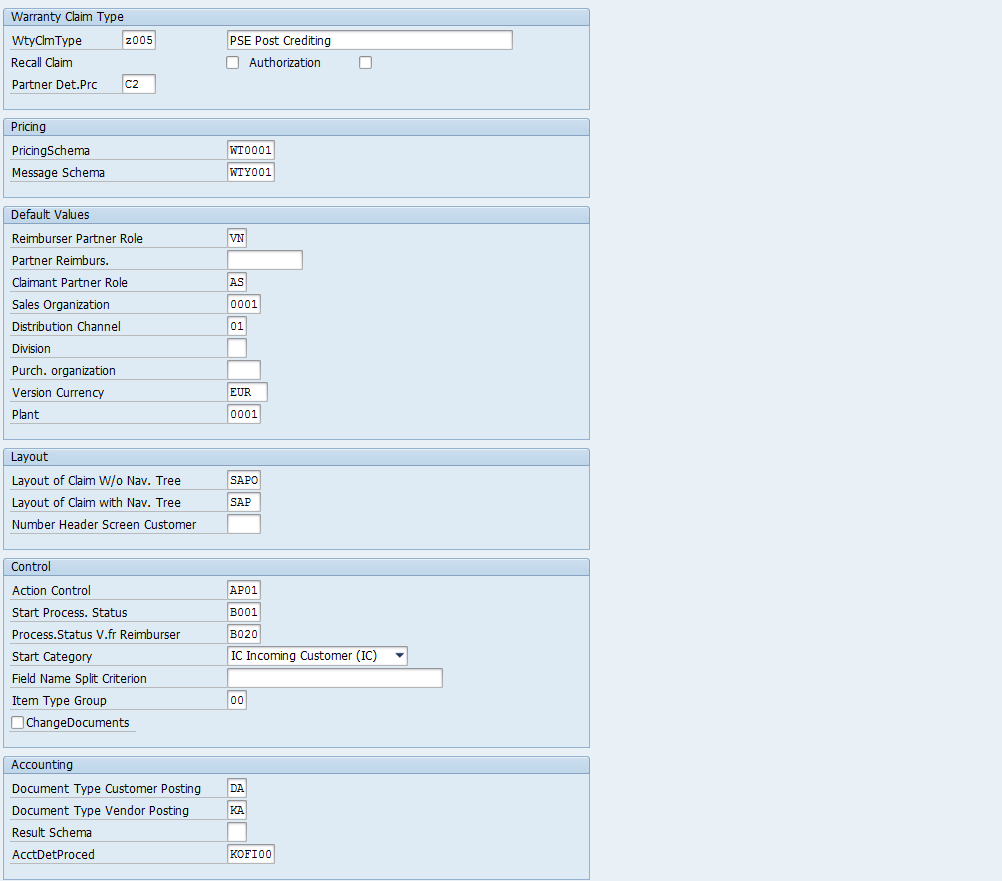
Start with renaming the warranty Claim type, I selected Z005 for this example, and changed the description. At this point, you can save and come back to these settings later, or update everything at once. Now, onto everything else.
Recall Claim: This sets this claim type as a recall. A recall is a special subset for warranty claims. In general, you can think of this as a defect in a product, and you want to create a bunch of claims all related to the same thing. This is a recall.
Authorization: Allows you to set this as applicable to authorization, WTYAUT transaction. In future posts, I’ll talk about the actual execution of the claim and go into transactions like these.
Partner Det.Prc: this like so many documents, allows you to set your own partner determination procedures. This is very handy to determine what partners can and should be related. Certain partners will be required no matter what, but we’ll get to those shortly.
Pricing
Pricing Schema: serves to determine specific prices for each warranty claim item and each warranty claim version and then to to post them to FI. In short, this is your pricing procedure.
Message Schema: this is your output determination procedure. Especially useful, since it’s likely you will have special documents, either printed or IDOC relevant to warranty claims.
Default Values
Reimburser Partner Role: This is a very important piece to notice here. I’ll do a post soon that talks about this more detail, but you need a specific partner type for your reimburser, and it must have some additional settings within it to allow it to be part of a warranty claim.
Partner Reimburs.: this allows you to set a default vendor or reimburser for the claim type. This is valuable if you always know who will be doing the work.
Claimant Partner Role: exactly like the Reimburser Partner Role. This is typically a customer, but this must be a specific partner type that gets assigned to the customer. I’ll go into this in a future post as well.
Sales Organization/Distribution Channel/Division/Purch organization/Plant: These are all defaults. So if your claim will only be used in a specific area, be sure to set it here. You will get the option to enter this information within each claim if you need.
Version Currency: self explanatory
Layout
The layout section is likely to be revamped as you better understand the flow of the warranty claim. You have complete control of how the screen is laid out, and you can do it with or without a navigation tree. We will discuss the Layout section in the future.
Layout of Claim w/o Nav. Tree:
Layout of Claim with Nav. Tree:
Number Header Screen Customer: When using customer exit WTY00001, a customer-specific screen area is activated in the bottom of the header data area in the warranty claim by using this screen number. The customer-specific screen area can have a maximum of two lines without a frame or one line with a frame.
Control
This section, like layout, is something you should configure your own values for. The control of the warranty claim is truly where the power resides in this technology. We’ll discuss the control section of configuration in future posts.
Action Control: set the action control profile
Start Process. Status: Based on your action control profile, you can define what status a claim should start at.
Process.Status v.fr Reimburser: Based on your action control profile, you can define what status a claim should start at.
Start Category: should the claim start with IC, OC, IV or OV
Field Name Split Criterion: If the claim can split, what field will determine how to split it.
Item Type Group: assigned to the warranty claim using the claim type. This means that only specific item types are allowed in a claim type and/or specific item types are excluded from a claim type.
Change Documents: this field I’m always a huge advocate of. In all instances, I encourage this field checked. Unless you’re really concerned with a change table, it can only benefit you to be able to see exactly how and when each change occurred.
Accounting
Document Type Customer Posting: The document type that you enter here is the document type for the warranty credit memo that is sent to the claimant. The claimant is the debtor in warranty processing. You define document types in Customizing for Warranty Processing under Accounting –> Define Document Types .
Document Type Vendor Posting: The documet type that you enter here is the document type for the warranty debit memo that is sent to the reimburser. The reimburser is the creditor in warranty processing.
Result Schema: This is for PA transfer. This is outside of my expertise, so always, talk to your FICO expert when filling in this field.
AcctDetProced: this is your account determination procedure. If you’re not sure, talk to your SD/FICO expert for guidance.
Now, that’s the define warranty claim types step in configuration. You will likely revisit this step in configuration if you following the configuration order listed in OWTY. I’ll talk about what you should configure first in the future.
Thanks fore reading 🙂
Hi Mike
This is a wonderful configuration tutorial on Warranty claims, really appreciate your sharing this knowledge. I was wondering if there any BPP’s to test run all of the WC scenarios like postcrediting, precrediting, recall, authorization etc. end to end, to test what we have configured and to see the whole process. Would greatly appreciate if you could provide some information on this.
Thanks
Bryan